 Recently, Beauty Big Bang sent me some products to test and review for your all. If you don't know what BBB is, they are a nail art company that offers a wide variety of nail art items for inexpensive prices, and also offers free worldwide shipping. If you live in Canada or anywhere outside of the US like me, this is great news because shipping usually costs an arm and a leg to get to me!
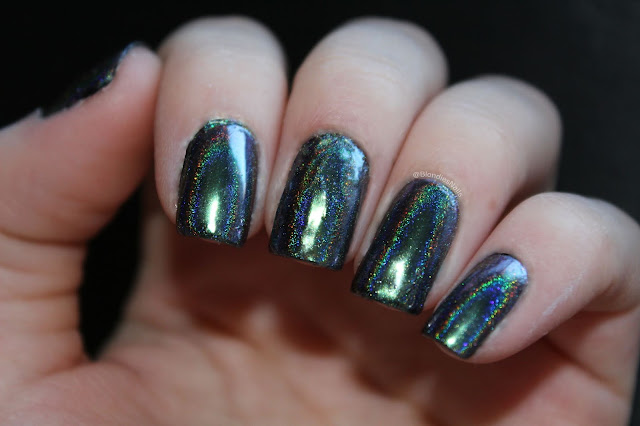
One of the items that I chose to review was BBB's Chameleon Aurora Flakes. I chose the colour 5C (Item ID: J7421) which contains a variety of blue, teal, purple, and silver holographic flakes. These flakes are similar to the ones that I reviewed last year for BBB, except they are opaque instead of iridescent.
The Chameleon Aurora Flakes are listed as $7.72CAD on Beauty Big Bang's website, and are currently on promotion for $4.76CAD. They come in a container with approximately 0.1g of product, which doesn't seem like a whole lot, but it is more than enough for several uses. It also comes with an applicator, which is similar to that of an eyeshadow sponge.
What I like about this product is that it is ridiculously easy to apply, does not require gel polish, and you can wear it 2 different ways: scattered or opaque. I made sure to take pictures of both types of application for you guys!
For the scattered effect, I first applied a black polish as a base. I then applied a regular topcoat and waited for it to get tacky but not completely dry. Next, with the applicator, I picked up a small amount of the flakes and gently dabbed over various spots on the nail. You want to be careful not to pick up too much product or dab the entire nail, as you want the design to look scattered and to not completely cover up the black base.
For an opaque look, you will need to apply a black base, and apply a regular topcoat. After the topcoat is tacky but not yet completely dry, you will want to take the applicator and pick up a generous helping of the flakes. You will next want to dab the product over the entirety of the nail. Once you have done this, you can buff the product all over the nail to fill in any gaps that you may have left behind. The reason why you want to dab the product before buffing it in is so that the sponge does not stick to the polish and smudge your base around. You can also just as easily create this look by buffing it onto a cured gel topcoat. However, I understand that not everyone has gel manicure systems at home, which is why I decided to tell you how to apply the flakes with a regular topcoat.
Honestly, my pictures cannot do this manicure justice! It looked way more stunning in person, and I received many compliments for wearing the opaque look. The finished design was a gorgeous multichrome with some scattered holographic flakes here and there. The flakes made my nails shift from green, to purple, blue, and teal. I will definitely wear this design in the future!
If you'd like to try out these Chameleon Aurora Flakes for yourself, be sure to check out Beauty Big Bang's website! You can also use my code BLONDIE to can get 10% off of your order.


